Redmill Gluten Free Bread In Bread Machine
Baking gluten-free bread in a bread machine is an easy and convenient way to enjoy a delicious homemade loaf. With just a few simple ingredients, you can make a tasty, nutritious loaf of bread that your whole family can enjoy. Redmill is one of the most popular brands of gluten-free flour, so if you[sq]re looking for the perfect bread machine recipe, this Redmill gluten-free bread is definitely worth a try!
Gluten-free bread recipes for a bread machine may require a different type of gluten-free flour than regular wheat-based recipes.
Gluten-free bread recipes for a bread machine are a great option for those who have gluten intolerance or have been diagnosed with celiac disease. Gluten-free bread recipes require a different type of gluten-free flour than regular wheat-based recipes, such as almond flour, coconut flour, chickpea flour, buckwheat flour, or a combination of flours. Most gluten-free bread recipes require xanthan gum or guar gum as a binder to help the dough stay together.
It is also important to use yeast that is labeled gluten-free when making gluten-free bread in a bread machine. Additionally, you may need to increase the amount of yeast used in the recipe as some gluten-free flours require more yeast to rise properly. Finally, it is important to note that gluten-free bread machine recipes may require more liquid and take longer to rise than regular wheat-based breads. With a few adjustments, however, it is possible to make delicious gluten-free bread in a bread machine.
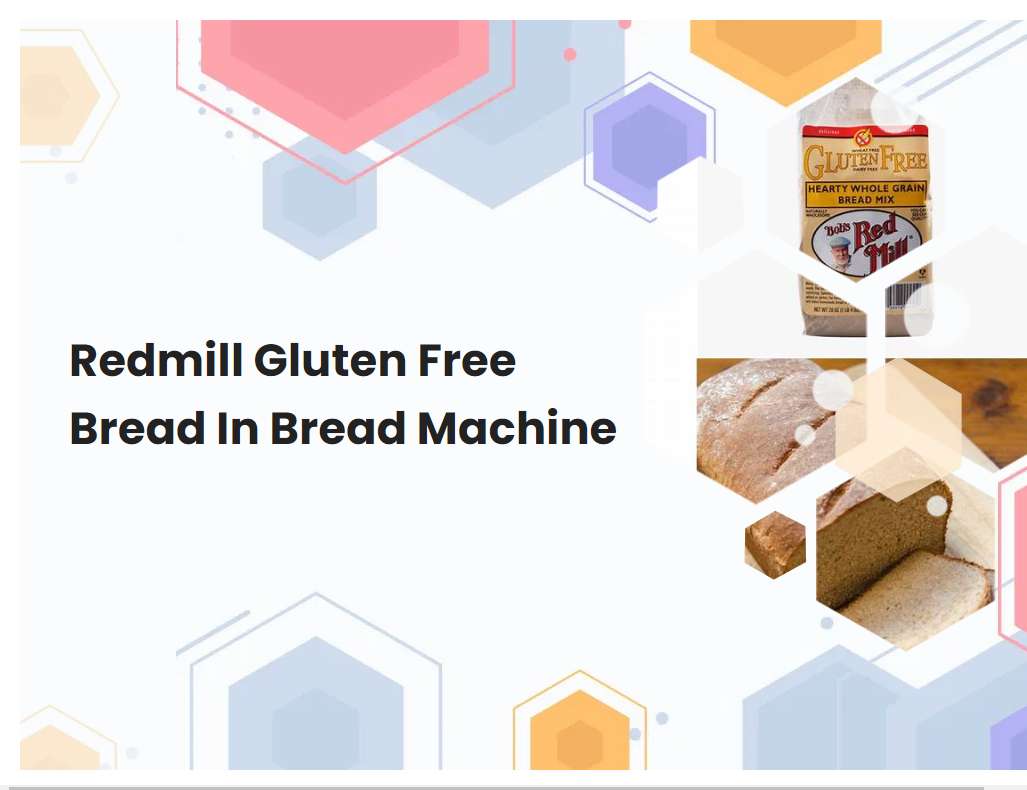
Generally, it is best to use a gluten-free mix or gluten-free flour that is specifically designed for bread machines.
When making gluten-free bread in a bread machine, it is important to use a gluten-free mix or flour that is specifically designed for bread machines. This is because regular all-purpose flour contains gluten, which can lead to a dense and gummy texture. Gluten-free mixes or flours are specifically formulated for bread machines and contain a variety of ingredients that help to create a light and fluffy texture.
Additionally, these mixes or flours often contain additional ingredients such as starches, gums, and other binding agents that help to create a better loaf of gluten-free bread. Additionally, using a pre-formulated mix or flour helps to ensure that all the ingredients are properly distributed throughout the dough, leading to a consistent texture in the finished loaf. Finally, these mixes or flours often contain yeast and other agents that help the dough to rise more quickly, helping to reduce the time needed for the bread to bake. Ultimately, using a gluten-free mix or flour specifically designed for bread machines will ensure that you get the best results when making gluten-free bread.
See also: Pizza Dough Base Plain Flour Bread Machine
Be sure to read and follow the instructions on the package carefully, as gluten-free flours can vary significantly in moisture content and absorbency.
When using gluten-free flours, it is essential to read and follow the instructions on the package carefully. Gluten-free flours can vary significantly in terms of moisture content and absorbency, so it is important to understand how your chosen flour will interact with other ingredients and the baking process. Different types of gluten-free flours have different water absorption rates, and this can affect the texture of your final product.
For example, some gluten-free flours may require more liquid than others, while some may need more dry ingredients to compensate for their low absorbency. Additionally, some gluten-free flours may require different baking temperatures or times to achieve the desired result. By following the instructions on the package and taking into account these various factors, you can ensure that your final product will be both delicious and safe to consume.
See also: Jellies In Bread Machine Without Lemon Juice
Make sure to use the gluten-free setting on your bread machine if available.
Using the gluten-free setting on your bread machine is a great way to ensure that your bread is free of gluten, which is necessary for those with celiac disease or a gluten sensitivity. Gluten-free bread machines have special settings designed to accommodate gluten-free recipes. Before adding ingredients to the machine, be sure to check the settings and make sure that it is on the gluten-free setting.
It's important to note that even if you are using a gluten-free recipe, if the machine is not set to the gluten-free setting, it will not make a gluten-free loaf of bread. When the machine is properly set to the gluten-free setting, it will adjust the mixing time and temperature accordingly depending on the recipe you are using. This will help to ensure that the dough is mixed properly and cooked at an appropriate temperature. Additionally, you may want to consider using a separate gluten-free baking pan as some machines may contain traces of wheat flour from past batches. Following these simple tips will help ensure that you are able to enjoy delicious, gluten-free bread from the comfort of your own home.
See also: Using Bread Machine To Proof Dough For Pizza
When adding ingredients, add wet ingredients first, then dry ingredients, and finally the yeast.
When baking bread, it is important to follow the order of ingredients listed in the recipe to ensure that the bread is successful. It is best to start by adding the wet ingredients first. This includes things like water, milk, eggs, vegetable oil, and melted butter.
Once all the wet ingredients are mixed together, begin adding the dry ingredients. This includes things like flour, sugar, salt, and other dry spices. Once all the dry ingredients are added, it is time to add the yeast. Yeast is a living organism and needs to be activated in order for the bread to rise and be successful. Make sure to add the yeast last and mix it in thoroughly before baking. Following this order of ingredients will help ensure that your bread turns out just right!
See also: How To Use West Bend Bread Machine
If the gluten-free bread dough is too wet or sticky, add a little more gluten-free flour.
If your gluten-free bread dough is too wet or sticky, don't worry! There is an easy fix. To correct this issue, simply add a little more gluten-free flour to the dough.
Start by adding 1 tablespoon of gluten-free flour at a time, mixing it into the dough with a spatula or wooden spoon. Keep adding and mixing until the dough is no longer sticky and has a texture that is easy to work with. Be careful not to add too much flour, as this can cause the bread to become dry and crumbly. Once you've added enough flour to make the dough easier to handle, knead it for a few minutes until it is smooth and has an elastic texture. Then you can shape your dough and bake your delicious gluten-free bread!
See also: Vegan Alternatives To Butter And Milk Powder For Bread Machine
When kneading the dough, be sure to knead it for the full kneading cycle as specified in the recipe.
Kneading the dough is an important step in the process of making a variety of baked goods, as it helps to ensure that the dough is properly mixed and its ingredients are evenly distributed. To knead the dough, it is important to start at one side and press down and away with the heel of your hand. Then turn the dough over, fold it in half and press down again with the heel.
Repeat this process for the full kneading cycle as specified in the recipe. It is important to knead the dough for the full amount of time in order to properly mix the ingredients, create gluten strands and make a more elastic dough that is easier to shape and bake. Kneading also helps to develop flavor, as it helps to activate some of the starches and sugars found in flours. Additionally, kneading helps to release moisture from the dough, which will help to create a light, airy texture when baked. Following the recipe's instructions for kneading times will help to ensure that your baked goods turn out perfect every time.
Gluten-free bread dough may not rise as much as wheat-based dough, so the baking time may be longer than usual.
Gluten-free bread dough is made without wheat flour, which means it lacks the gluten proteins that help wheat-based dough to rise. This makes gluten-free bread dough more dense and can lead to a drier texture. As a result, gluten-free bread dough may not rise as much as wheat-based dough, so the baking time may be longer than usual.
To ensure a light and fluffy loaf, you should check your gluten-free bread dough before baking. If it has not risen by the recommended time in the recipe, you may need to increase the baking time. It is also important to let the bread cool before slicing, as this will allow the crumb to set and help it to keep its shape. Baking gluten-free bread can be a bit of a challenge, but with some patience and practice you can create delicious loaves that are sure to please.
To ensure a good rise, use a higher-protein gluten-free flour for your bread machine recipes, such as buckwheat or quinoa flour.
Bread machines are a great way to make delicious, homemade bread without a lot of fuss. However, when baking gluten-free breads in a bread machine, it's important to use a higher-protein gluten-free flour like buckwheat or quinoa flour to ensure a good rise. Buckwheat flour is made from the seeds of the buckwheat plant and is an excellent source of protein, fiber, and essential minerals.
Quinoa flour is made from ground quinoa and is also a great source of protein and fiber. Both buckwheat and quinoa flours work well in bread machine recipes, and they help to create a lighter texture and a better rise than other gluten-free flours. When using either of these flours for bread machine recipes, it's important to note that you may need to increase the yeast content or add additional liquid to ensure that your bread rises properly. Additionally, it's important to pay attention to the instructions in the bread machine recipe, as the baking time may need to be adjusted when using these flours. With a little bit of experimentation, you can create delicious gluten-free breads with a perfect rise using buckwheat or quinoa flour in your bread machine recipes.
To ensure that a crusty texture is achieved, spray the surface of the loaf with water before baking and again when it is half way through baking.
To achieve a crusty texture in a loaf of bread, it is important to spray the surface of the dough with water prior to baking. This will help create steam in the oven, which will in turn create a delicious crust. Additionally, it is important to spray the dough halfway through baking as this will help create an even thicker and crunchier texture.
When spraying the dough, it is important to use a fine mist so that the surface does not become overly wet. The use of water during baking will help the bread to expand and create a crispy textured crust. Additionally, it is important to allow the bread to cool fully before cutting or eating to ensure that the crusty texture achieved is maintained.


