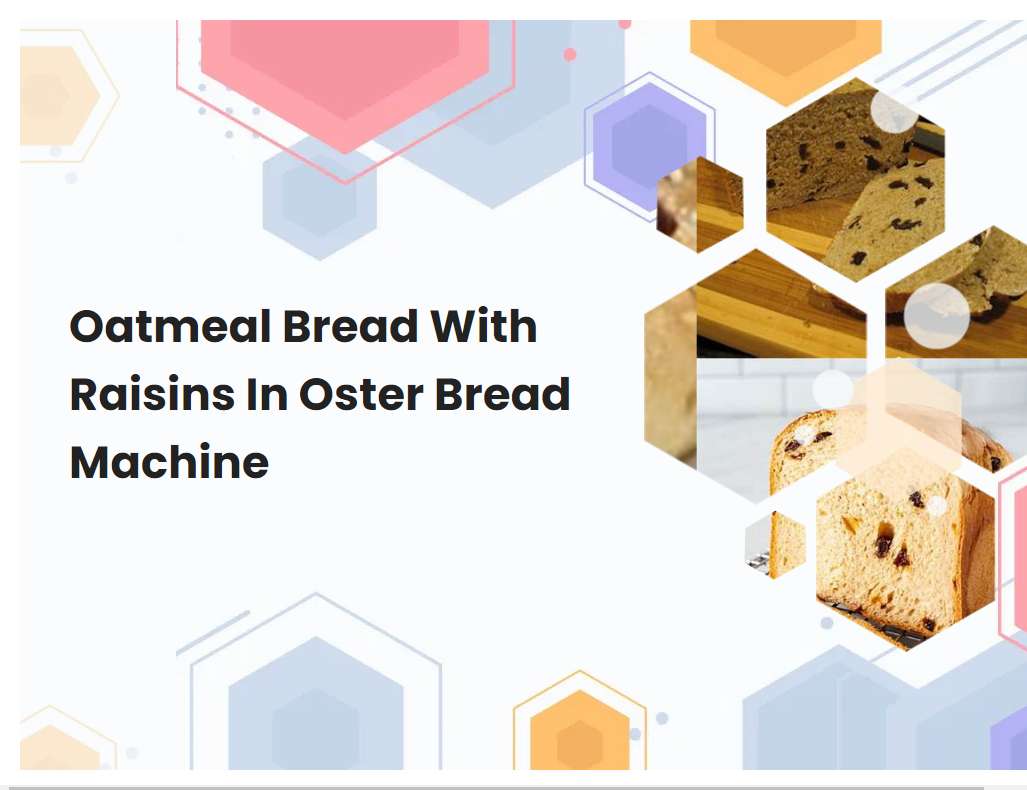
Oatmeal Bread With Raisins In Oster Bread Machine
Oatmeal bread with raisins is a wonderfully tasty and easy-to-make bread that can be made in an Oster bread machine. This bread is a popular choice for breakfast, as it is full of wholesome oats and sweet raisins. Making this bread in an Oster bread machine is sure to be a great experience, as the machine takes care of all the hard work for you.
Measure out all of the ingredients accurately according to the recipe.
When measuring out the ingredients for a recipe, it is important to do so accurately in order to achieve the best results. For dry ingredients, it is best to use either a kitchen scale or measuring cups and spoons. A kitchen scale is more accurate, however if the recipe does not specify, then measuring cups and spoons can also be used.
It is also important to make sure that the measuring cups and spoons are leveled off. If using a kitchen scale, make sure to zero out the scale before adding each ingredient. For liquids, measuring cups with spouts and a tablespoon should be used. It is important to fill up the measuring cup to the appropriate line and then use the tablespoon to scoop it out. Make sure to not pack down the ingredients when measuring them out. Finally, all ingredients should be added to the recipe in the order stated in the recipe. Following these steps will ensure that all of the ingredients are measured out accurately and that the recipe turns out as expected.
Use the appropriate setting on the bread machine for oatmeal bread.
The appropriate setting on a bread machine for oatmeal bread is the "Quick Bread" setting. This setting is designed to bake loaves of quick breads, such as oatmeal bread, in a shorter amount of time than the standard bread settings. The Quick Bread setting typically has a shorter kneading cycle, so the dough can be mixed, kneaded, and baked in less time.
The Quick Bread setting also has a longer rising cycle than the other settings, allowing the dough to rise and develop flavor before baking. This setting also uses a slightly lower temperature to help the oatmeal bread achieve the desired texture and consistency. Finally, the Quick Bread setting typically has a slightly shorter baking cycle than the other settings, allowing the oatmeal bread to bake quicker. By using the Quick Bread setting on a bread machine, you can easily make delicious oatmeal bread in a fraction of the time.
See also: Honey Bread With Honey Glaze Bread Machine
Make sure to use the right type of yeast for oatmeal bread.
When baking oatmeal bread, it is important to use the right type of yeast. Different types of yeast are used for different types of doughs, and oatmeal bread is no exception. One of the most commonly used types of yeast for oatmeal bread is active dry yeast.
This type of yeast is mixed with warm water and a bit of sugar before being added to the dough, allowing it to become active as it reacts with the sugar. Active dry yeast creates a slightly chewier texture in the finished product, which makes it great for oatmeal bread. Instant yeast can also be used for oatmeal bread, but it will not create the same texture as active dry yeast. Instant yeast does not need to be activated with sugar and warm water, so it will create a lighter texture in the finished product. Either type of yeast will work for oatmeal bread, so it is important to consider the desired texture before choosing which type to use.
See also: Bread Machine Bread For Peanut Butter And Jelly Sanwiches
Ensure that the yeast is fresh before using it.
Prior to using yeast in a recipe, it is important to ensure that it is fresh. Yeast is a living microorganism, so it is important to use it in a timely manner before it loses its potency. To check if yeast is still fresh, first examine the package and make sure the expiration date has not passed.
Then, dissolve the yeast in warm water and stir in a teaspoon of sugar. If the mixture begins to foam within 10 minutes, the yeast is still fresh and ready for use. If it does not foam, the yeast is no longer viable and should be discarded. It is important to use fresh yeast as an old batch may not produce the desired rise in your recipe, resulting in a dry or dense end product.
See also: Do I Need To Use Bread Machine Flour
Add the raisins at the appropriate time during the kneading cycle.
When kneading dough that includes raisins, it's important to add them at the appropriate time in order to get the best results. The best time to add raisins is during the last portion of the kneading cycle. This will ensure that the raisins are evenly distributed throughout the dough and that they retain their shape.
It's important to add the raisins slowly and gently to ensure that they don't become overworked and lose flavor. Once the raisins have been added, it's important to continue kneading the dough until it is well mixed. This will help ensure that the raisins are fully incorporated into the dough and that the texture of the final product will be consistent. Adding raisins at the appropriate time during the kneading cycle will help ensure that your baked goods turn out perfect everytime.
See also: How To Add Onions To My Bread Machine
Add enough liquid to the dough to make a soft and moist bread.
The amount of liquid needed to make a soft and moist bread will vary depending on the type of dough you are using. For instance, whole wheat dough will require more liquid than white bread dough. Generally, you can start by adding 1/4 cup of liquid per cup of flour.
This can be milk, water, or any other liquid you prefer. If the dough feels too dry, add a bit more liquid until it reaches a soft and moist consistency that is easy to handle and shape. Make sure to mix the dough well after adding the liquid to make sure the ingredients are fully incorporated. Once the dough is sufficiently moistened, it should be ready for shaping and baking.
See also: Difference Between Bread Machine Yeast And Normal Yeast
Allow the bread to cool completely before slicing it.
It is important to allow bread to cool completely before slicing it in order to ensure that the bread maintains its perfect texture and shape. If bread is cut while hot, it will be gummy, causing it to lose its desired texture. Also, the heat from the bread can cause the knife to become dull and make it difficult to get an even cut.
Allowing the bread to cool completely before slicing will make it easier to get clean and even slices. Cooling the bread will also help the bread keep its shape, which will make it more attractive when it is served. Additionally, when the bread is cooled, it will be easier to handle and less likely to crumble when sliced. To ensure that the bread is perfectly cooled before slicing, let it sit on a cooling rack for at least 30 minutes.
Store the bread in an airtight container to keep it fresh longer.
Storing bread in an airtight container is the best way to keep it fresh for longer. An airtight container will help to protect the bread from moisture, oxygen, and pests that would otherwise cause it to become stale or moldy. It's important to choose a container that is the right size for the amount of bread that needs to be stored.
A container should also be made of a material that will not allow air to enter it and cause the bread to dry out. Additionally, it's important to make sure that the lid of the container is securely closed at all times. If the container is stored in a cool and dry place, the bread will stay fresher for longer. By taking these steps, you can ensure that your bread will remain fresh and delicious for several days.
Use a good quality non-stick pan to bake the bread in the oven.
Baking bread in the oven is a simple yet rewarding process. To get the best results, it is important to use a good quality non-stick pan. Non-stick pans are specifically designed to be used in the oven, as they are able to withstand high temperatures without being damaged.
The non-stick coating on the pan will also prevent the bread from sticking to the sides and burning, as well as make cleaning up easier. When using a non-stick pan for baking bread, it is important to make sure that the pan has been preheated before adding the bread dough to it. This will ensure that the dough will cook evenly and prevent sticking. Additionally, using a non-stick pan will make it easier to remove the bread from the pan once it is finished baking. All in all, using a good quality non-stick pan is essential for achieving perfect results when baking bread in the oven.
Store any leftover bread in the refrigerator for up to 5 days.
Storing leftover bread in the refrigerator is the best way to keep it fresh for up to 5 days. To do so, wrap the bread tightly in either plastic wrap or foil, ensuring that no air can get in and cause the bread to dry out. Then place the wrapped bread in a plastic bag and store it in the refrigerator.
Be sure to check on the bread periodically to ensure it is still fresh and hasn't developed any mold. If there is any mold present, discard of the bread immediately. Bread can also be frozen for up to 3 months. To properly freeze bread, wrap it tightly in plastic wrap and then place the wrapped bread in a freezer-safe plastic bag or container. When ready to use, thaw the frozen bread in the refrigerator overnight. For best results, try to use the frozen bread within 2 weeks.


